
Shark Navigator Lift-Away Instructions: A Comprehensive Guide
Discover effective cleaning solutions for your Shark Navigator! This guide details assembly, operation, maintenance, and troubleshooting, referencing models like NV352, NV356E, UV730, and NV380.
Understanding Your Shark Navigator Lift-Away
The Shark Navigator Lift-Away is engineered for versatile floor cleaning, seamlessly transitioning between upright and handheld modes. Its core strength lies in the “Lift-Away” technology, allowing the canister to detach for convenient cleaning of stairs, upholstery, and hard-to-reach areas.
Models like the NV352, NV356E, UV730, and NV380 share fundamental features – powerful suction, HEPA filtration for allergen reduction, and swivel steering for maneuverability. Understanding these basics is crucial. The Navigator series is designed for both carpets and bare floors, offering adjustable settings to optimize cleaning performance. Accessing the official user manuals (available on ManualsLib and Amazon) provides detailed insights into your specific model’s capabilities and features, ensuring optimal usage and longevity.
Model Variations & Common Features
Shark Navigator Lift-Away vacuums boast several variations, including the NV352, NV356E, UV730, and NV380 series, each with slight design and feature differences. However, core functionalities remain consistent across the line. Common features include the Lift-Away canister for portability, powerful suction optimized for various floor types, and HEPA filtration to trap allergens.
Most models incorporate swivel steering for enhanced maneuverability and include a range of attachments like dusting brushes and crevice tools. The UV730 Series features the PowerFins HairPro brushroll, designed to tackle pet hair effectively. Referencing the specific owner’s manual (found on ManualsLib) will clarify the unique attributes of your particular Navigator model, ensuring you utilize all its capabilities.
Assembling Your Shark Navigator
Initial assembly of your Shark Navigator Lift-Away is straightforward. Begin by connecting the wand to the vacuum body, ensuring a secure click to confirm proper attachment. Next, attach the hose to both the wand and the vacuum base, again listening for a distinct locking sound. Different models may have slightly varied connection points, so consult your specific owner’s manual (available via ManualsLib) for precise guidance.
Before powering on, verify all connections are firm. The Navigator is designed for easy component attachment, allowing quick transitions between upright and portable modes. Proper assembly is crucial for optimal suction and performance, maximizing the cleaning efficiency of your Shark vacuum.
Connecting the Wand and Hose
Securely attaching the wand and hose is fundamental to your Shark Navigator’s functionality. First, align the wand with the designated port on the vacuum body or canister – a click indicates a proper fit. Subsequently, connect the hose to both the wand and the vacuum base, ensuring a tight seal at each connection point.
Refer to your model’s owner’s manual (like the NV356E or UV730 series manuals found on ManualsLib) for visual aids if needed. A loose connection can significantly reduce suction power. Regularly check these connections during use to maintain optimal performance. This simple step ensures efficient dirt and debris removal throughout your cleaning sessions.
Attaching the Dusting Brush
Enhance your Shark Navigator’s versatility by attaching the dusting brush! This tool is ideal for delicate surfaces, furniture, and reaching tight spaces. Locate the dusting brush among your included accessories – often featured with models like the NV352. Simply slide the brush onto the end of the wand or hose, ensuring it clicks securely into place.
The dusting brush allows for gentle yet effective cleaning, preventing scratches on sensitive items. Consult your owner’s manual (available on ManualsLib for series like UV730 and NV380) for specific attachment instructions. Regularly using the dusting brush expands your vacuum’s cleaning capabilities beyond floors.
Initial Setup and Powering On
Before your first cleaning session, ensure your Shark Navigator is properly assembled – refer to the assembly instructions for connecting the wand and hose. Locate the power cord and plug it into a grounded electrical outlet. The power button is typically located on the main body of the vacuum, easily accessible for operation.
Confirm the dust cup is correctly installed and empty. Review your model’s owner’s manual (like those for NV356E, UV730, or NV380 found on ManualsLib) for specific power-on sequences. Once powered on, select your desired floor setting for optimal cleaning performance, as detailed in the comprehensive guide.
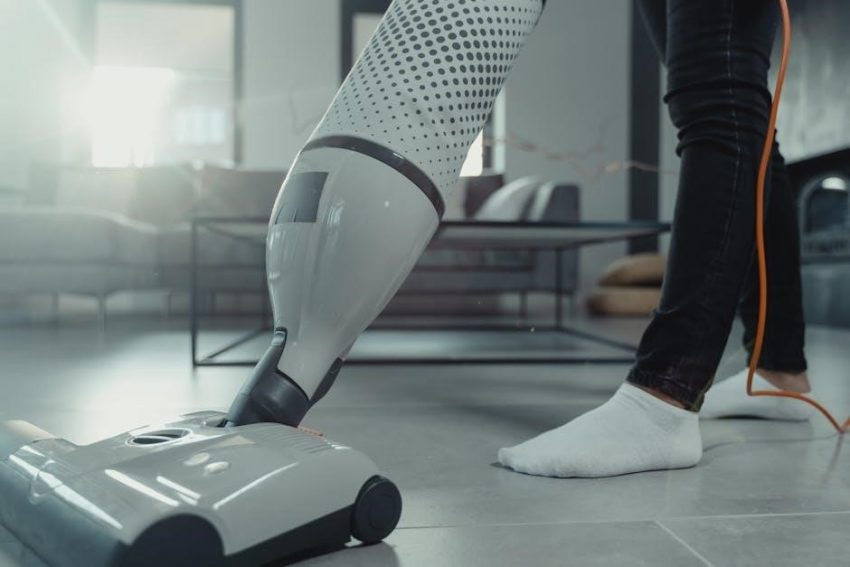
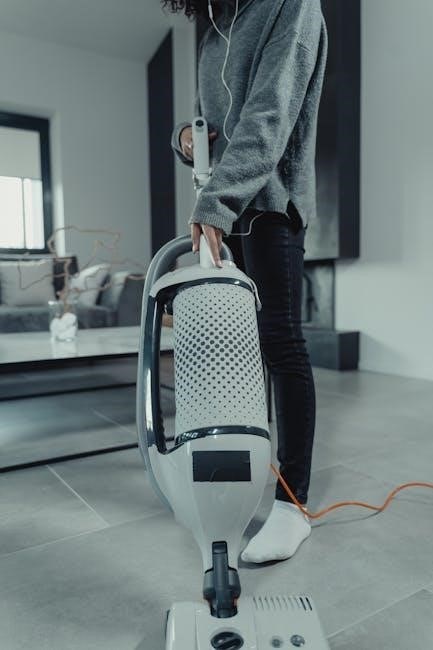
Using the Lift-Away Feature
The Lift-Away feature transforms your Shark Navigator into a portable handheld vacuum, ideal for stairs, upholstery, and tight spaces. To detach the canister, locate the release button – typically on the top or side – and press to separate it from the base. Ensure the canister is securely locked before lifting.
Once detached, the wand and accessories can be directly connected to the canister for enhanced maneuverability. This functionality, highlighted in models like the NV352, provides versatile cleaning options. Refer to your owner’s manual for specific instructions related to your Shark Navigator series (UV730, NV380) for optimal use.
Detaching the Canister
To utilize the Lift-Away function, begin by detaching the canister from the floor nozzle. Locate the release button, commonly positioned on the top or side of the canister assembly. Press this button firmly; you should hear a click indicating release. Gently lift the canister upwards and away from the base.
Ensure a secure grip during detachment to prevent accidental drops. The canister houses the motor and dust cup, so handle with care. Models like the NV356E and UV730 feature similar detachment mechanisms. Always consult your specific model’s owner’s manual (NV380 series) for detailed illustrations and safety precautions before proceeding;
Converting to Handheld Mode
Once the canister is detached, converting to handheld mode is straightforward. Locate the handle on the canister. A release button, often color-coded, allows you to adjust and secure the handle for handheld use. Press the button and rotate or adjust the handle until it locks into the desired position.
This configuration is ideal for cleaning upholstery, stairs, and tight spaces. Attach desired accessories like the crevice tool (available with NV352) for targeted cleaning; Remember to securely lock the handle before use. Refer to your model’s manual (UV730 series) for specific instructions and safety guidelines regarding handheld operation.
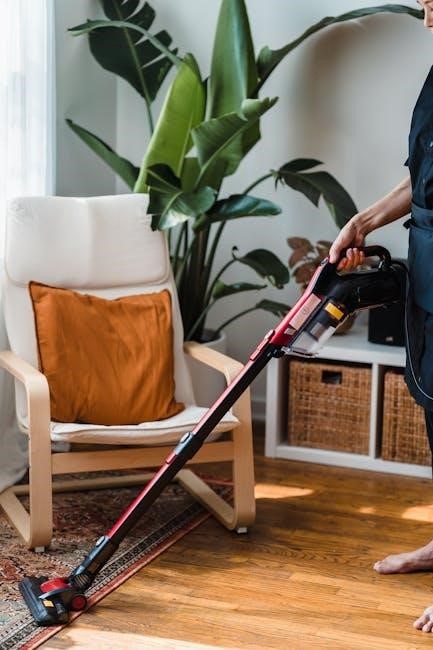
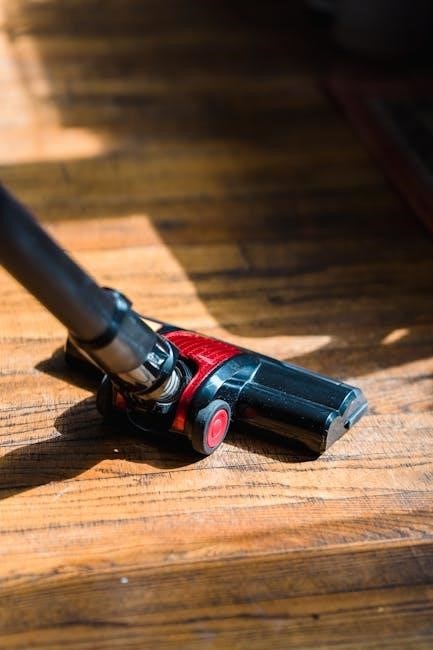
Cleaning Different Floor Types
The Shark Navigator Lift-Away excels on various floor surfaces. For carpets, utilize the brushroll and adjust the power settings – higher for deep cleaning, lower for area rugs. The NV352 model is particularly suited for carpets. On hard floors, disable the brushroll to prevent scattering debris and avoid scratching.
Models like the UV730 Series feature PowerFins for effective hard floor cleaning. Area rugs require careful consideration; adjust the suction and brushroll settings to prevent damage. Always test a small, inconspicuous area first. Refer to your specific model’s manual (NV380 Series) for optimal settings and recommendations for different floor types.
Carpet Cleaning Settings
For optimal carpet cleaning with your Shark Navigator Lift-Away, begin by selecting the appropriate power setting. Higher settings, available on models like the NV356E, are ideal for deep cleaning heavily soiled carpets and removing embedded dirt. Lower settings are suitable for lighter cleaning and maintaining already clean carpets.

Engage the brushroll to agitate and lift debris. The NV352 model’s brushroll is effective on various carpet piles. For thicker carpets, a slower speed may be preferable. Regularly check the brushroll for tangled hair or fibers to maintain performance. Always test a small area first to ensure compatibility and prevent damage.
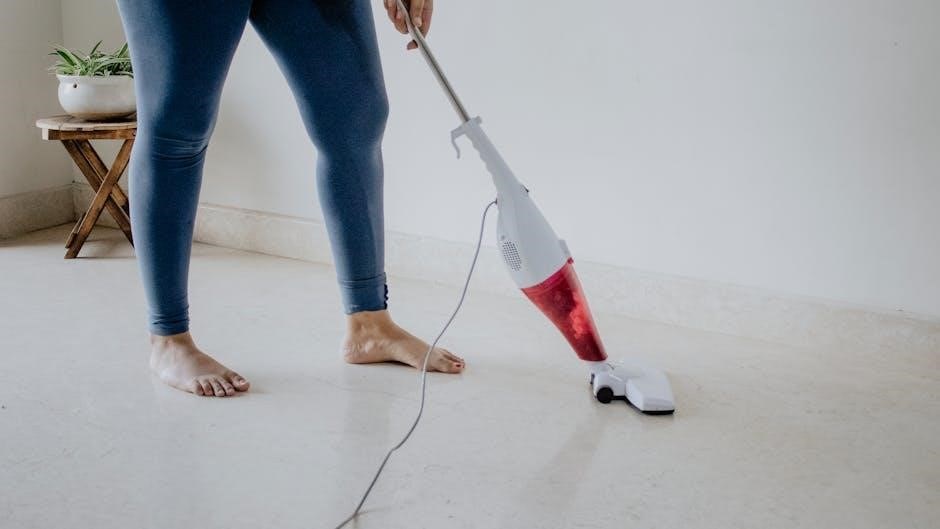
Hard Floor Cleaning Settings
To effectively clean hard floors with your Shark Navigator Lift-Away, disable the brushroll. This prevents scattering debris and potential scratching. Many models, including the UV730 series, feature a dedicated “Hard Floor” setting or a brushroll on/off switch; Utilize the suction control to adjust power based on floor type and debris level.
For delicate hard floors like hardwood, use the lowest suction setting. Higher settings are suitable for tile or linoleum. Consider using the dusting brush attachment for edges and corners. Regularly inspect the vacuum path to ensure no damage occurs, and always test in an inconspicuous area first.
Area Rug Considerations
When cleaning area rugs with your Shark Navigator Lift-Away, adjust settings based on rug pile height and material. For low-pile rugs, a lower suction setting and the brushroll engaged can effectively lift dirt. However, for high-pile or delicate rugs, disengage the brushroll to prevent damage or tangling.
Utilize the suction control to find the optimal balance between cleaning power and rug preservation. Test a small, hidden area first to ensure compatibility; The Lift-Away feature is particularly useful for maneuvering around furniture and cleaning under edges. Avoid excessive force, and consider using the dusting brush for fringes.
Emptying and Maintaining the Dust Cup
Regular dust cup emptying is crucial for maintaining optimal suction power with your Shark Navigator Lift-Away. Locate the release button – typically on the underside of the canister – and detach the dust cup. Empty contents into a trash receptacle, avoiding overfilling to prevent clogging.
For thorough cleaning, wash the dust cup with cool water and mild detergent. Ensure it’s completely dry before reattaching. Periodically, check for obstructions in the dust path. A clean dust cup and filters are essential for peak performance and allergen reduction, contributing to a healthier home environment.
Locating and Removing the Dust Cup
The dust cup on your Shark Navigator Lift-Away is typically found at the base of the canister; To remove it, look for a release button – often red or clearly marked – located on the underside or front of the dust cup itself. Press this button firmly to disengage the locking mechanism.
Once released, gently pull the dust cup downwards and away from the vacuum body. Avoid forcing it, as this could damage the attachment points. Empty the collected debris into a trash receptacle. Familiarize yourself with this process for quick and easy maintenance, ensuring consistent cleaning performance.
Cleaning the Dust Cup and Filters
After emptying the dust cup, rinse it thoroughly with cool water. Avoid using soap, as residue can attract dust. Ensure the cup is completely dry before reattaching it to the vacuum. Regularly cleaning the filters is crucial for maintaining suction power.
Remove the filters – typically a pre-motor and a HEPA filter – and gently tap them to remove loose debris. Some filters are washable; check your model’s manual for specific instructions. Allow washable filters to air dry completely before reinstalling. Replacing filters periodically, as recommended, optimizes performance and air quality.

Filter Maintenance and Replacement
Shark Navigator vacuums utilize multiple filters – pre-motor, post-motor, and HEPA – each playing a vital role in filtration. The pre-motor filter protects the motor, while the HEPA filter traps fine dust and allergens. Regular maintenance extends filter life and ensures optimal cleaning performance.
Cleaning frequency depends on usage, but generally, filters should be cleaned every month. Washable filters require complete drying before reinstallation. Replacement frequency varies; HEPA filters typically need replacing every six to twelve months, while foam pre-motor filters may last longer. Refer to your owner’s manual for specific recommendations based on your model.
Types of Filters (HEPA, Pre-Motor, Post-Motor)
Shark Navigator Lift-Away vacuums employ a multi-filter system for comprehensive cleaning. The Pre-Motor Filter, usually foam, safeguards the motor from dust ingestion, extending its lifespan. It’s typically washable and reusable, requiring periodic cleaning. The Post-Motor Filter captures smaller particles after the motor, preventing them from being exhausted back into the air.
Crucially, many models feature a HEPA Filter (High-Efficiency Particulate Air). This filter traps 99.97% of particles 0.3 microns in size, including allergens, dust mites, and pollen, making it ideal for allergy sufferers. Understanding each filter’s function is key to proper maintenance.
Cleaning and Replacing Filters – Frequency
Maintaining your Shark Navigator’s filters is vital for optimal performance. The Pre-Motor Filter should be washed monthly, ensuring it’s completely dry before reinstallation – typically every 30 days. The Post-Motor Filter benefits from cleaning every three months, or as needed, depending on usage.
HEPA Filters are generally not washable; replacement is recommended every six to twelve months. Frequent use, pet ownership, or allergy sensitivities may necessitate more frequent changes; Regularly checking filters for damage or excessive dirt buildup is crucial. Ignoring filter maintenance leads to reduced suction and potential motor issues.
Troubleshooting Common Issues
Encountering problems with your Shark Navigator? Loss of suction often indicates a full dust cup, clogged filters, or a blockage in the hose or wand. Check these areas first! If the brushroll isn’t spinning, inspect for tangled hair, string, or debris. Ensure the power cord is securely connected and the brushroll is properly engaged.
Error codes, if displayed, require consulting your specific model’s manual for interpretation. Common issues include overheating or motor faults. Always unplug the vacuum before attempting any repairs. If problems persist, refer to Shark’s customer support or a qualified technician.

Loss of Suction
Reduced suction power is a frequent concern with Shark Navigator vacuums. The primary culprit is often a full dust cup – empty it regularly! Clogged filters significantly restrict airflow; clean or replace them as recommended. Inspect the hose, wand, and floor nozzle for blockages caused by larger debris.
Ensure all connections are secure and airtight. A loose connection diminishes suction. Check for obstructions around the brushroll. Finally, verify the vacuum isn’t set to a lower power setting if applicable. Addressing these points should restore optimal suction performance.
Brushroll Not Spinning
If your Shark Navigator’s brushroll isn’t rotating, several issues could be at play. First, check for tangled hair, string, or debris wrapped around the brushroll itself – this is a common cause. Power issues can also prevent operation; ensure the vacuum is properly plugged in and the power switch is engaged.
Inspect the belt for breakage or stretching; a damaged belt requires replacement. A clogged hose or full dust cup can also strain the motor and stop the brushroll. Finally, some models have a brushroll on/off switch – confirm it’s in the ‘on’ position.
Error Codes and What They Mean
While specific error codes vary by Shark Navigator model, understanding them is crucial for quick troubleshooting. Many newer models display codes indicating airflow blockages, often signaled by a flashing light. This usually means a clogged hose, duct, or a full dust cup needs immediate attention.
Other codes might point to motor overheating, requiring you to let the vacuum cool down before restarting. Refer to your specific model’s owner’s manual (like NV356E, UV730, or NV380 series) for a complete list and detailed explanations of each error code and recommended solutions. Ignoring error codes can lead to further damage.