

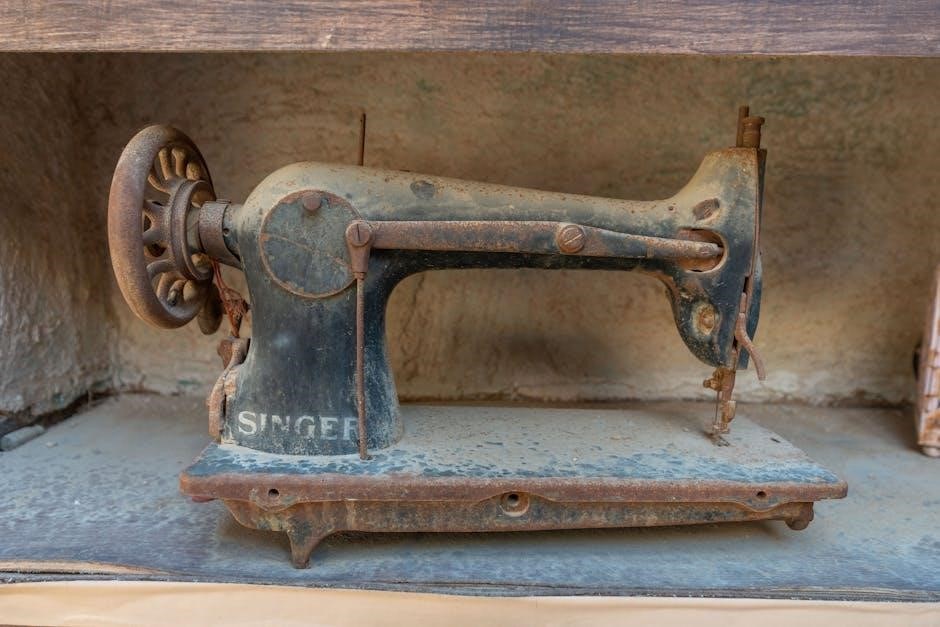
Singer sewing machines, dating back to 1851, represent a rich history of innovation and quality craftsmanship.
These durable machines, often sought after today, offer a unique sewing experience.
Exploring vintage Singer models provides access to detailed manuals, both online and through official archives,
facilitating restoration and continued use of these iconic machines.
From basic mechanical models to more advanced designs, a Singer machine catered to diverse sewing needs,
and many remain fully functional with proper care and maintenance, even today.
Historical Significance of Singer
Singer revolutionized home sewing with Isaac Singer’s 1851 patent, creating the first commercially successful sewing machine.
This innovation dramatically reduced sewing time and costs, impacting both households and the garment industry.
Early Singer machines, accompanied by detailed instruction manuals, empowered individuals to create and repair clothing independently.
The company’s marketing strategies and installment plans made sewing machines accessible to a wider audience.
Singer’s global presence and continuous improvements in design cemented its position as a leading manufacturer,
leaving an enduring legacy in sewing technology and cultural history.
Why Use an Old Singer?
Vintage Singer sewing machines offer remarkable durability and build quality, often surpassing modern counterparts.
Many sewers appreciate their robust construction and ability to handle heavier fabrics with ease.
Access to original instruction manuals allows for authentic operation and maintenance, preserving the machine’s functionality.
These machines often require less electronic repair, relying on mechanical simplicity.
Beyond practicality, owning a vintage Singer connects you to a rich history of craftsmanship and provides a unique,
satisfying sewing experience, embodying a slower, more deliberate approach to creation.

Identifying Your Singer Sewing Machine
Singer machines are identified by model and serial numbers, crucial for finding correct instruction manuals and parts.
Locating these numbers unlocks a wealth of information for restoration and repair.
Locating the Model Number
Identifying the model number is the first step in researching your vintage Singer. Typically, it’s found on a metal plate affixed to the machine.
Look for a plate on the front, side, or back of the sewing head – often near the handwheel or under the bed of the machine.
The model number is usually a combination of letters and numbers, like “99K” or “201-2”.
This number is vital when searching for specific instruction manuals or replacement parts, ensuring compatibility and accurate information for your machine.
Carefully note the complete number, as even slight variations can indicate different versions of the same model.
Decoding the Serial Number
Singer serial numbers, found alongside the model number, reveal the year your machine was manufactured. These numbers are crucial for dating your vintage Singer and locating appropriate instruction manuals.
Decoding requires referencing serial number charts available online – many vintage Singer communities maintain these resources. The serial number is typically a long string of numbers, often starting with letters.
Knowing the production year can help understand the machine’s features and potential variations, aiding in restoration and troubleshooting efforts.
Common Vintage Singer Models
Several Singer models are particularly popular among collectors and vintage sewing enthusiasts. The Singer 99, known for its zigzag capabilities, frequently appears with available instruction manuals online.
The Singer 201 and 201-2 are also highly regarded for their durability and versatility. Finding a manual for these models is often easier due to their widespread use.
Other sought-after models include the Featherweight 221 and various treadle machines, each with unique features and dedicated online resources.

Understanding the Parts of a Singer Sewing Machine
Singer machines, though varied, share core components: the handwheel, presser foot, needle, and bobbin winder.
Detailed manuals illustrate each part’s function and proper usage for optimal sewing performance.
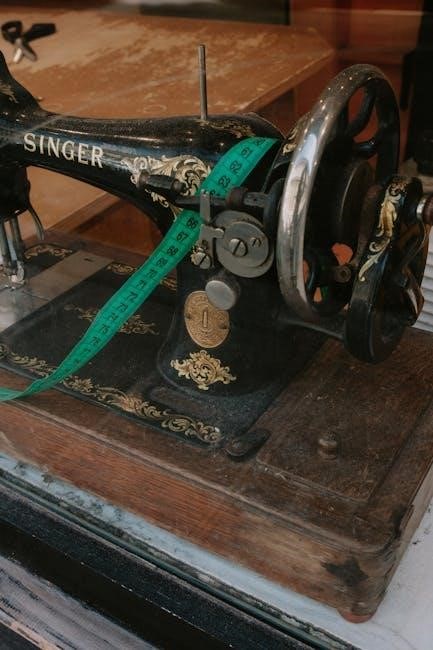
The Handwheel and Flywheel
The handwheel, a prominent feature on vintage Singer machines, controls the needle’s movement; turning it manually raises and lowers the needle.
Flywheels, often integrated with the handwheel, provide momentum, ensuring smooth and consistent stitching.
Instruction manuals emphasize turning the handwheel towards the operator for proper control.
Understanding this mechanism is crucial for precise sewing and avoiding jams.
Older models may require a firm, steady hand to maintain rhythm, as detailed in original Singer guides.
Regular cleaning and occasional oiling, as per the manual, keep these components functioning optimally.
The Needle and Needle Clamp
Vintage Singer machines utilize specific needle types, detailed in their instruction manuals. The needle, crucial for stitch formation, must be correctly inserted into the needle clamp.
Manuals stress the importance of a firmly tightened needle clamp – not too loose, causing wobble, nor too tight, risking breakage.
Always ensure the flat side of the needle faces the back when installing.
Regularly check for burrs or damage to both the needle and clamp, replacing them as needed to maintain consistent stitch quality.
The Presser Foot and Shank
Vintage Singer sewing machine manuals detail the presser foot’s function: holding fabric firmly during stitching. The presser foot attaches to the shank, a crucial component for consistent pressure.
Different presser feet exist for various tasks – zigzag, buttonholes, and more – often outlined in the manual. Proper attachment is vital; a loose foot causes uneven stitches.
Manuals emphasize regular cleaning around the shank to prevent lint buildup, which can hinder smooth operation and affect stitch quality. Inspect for wear regularly.
The Bobbin Winder
Vintage Singer sewing machine manuals dedicate significant space to the bobbin winder, a critical component for consistent sewing. The process involves placing the bobbin on the winder spindle and engaging the mechanism.
Manuals illustrate proper thread guidance to ensure even winding, preventing uneven tension and potential jams. Adjusting the winder tension is often necessary, depending on thread type.
Following the manual’s instructions prevents overfilling or underfilling the bobbin, both of which impact stitch quality. Disengaging the winder correctly is also emphasized.
The Tension Discs
Vintage Singer sewing machine manuals detail the crucial role of tension discs in achieving balanced stitches. These discs control the upper thread’s resistance, working in harmony with the bobbin tension.
Manuals often include diagrams illustrating how to thread the upper thread correctly between the tension discs, ensuring proper engagement. Adjusting the tension screw is explained for different fabric weights.
Incorrect tension leads to looping or puckering; manuals provide troubleshooting steps for identifying and correcting these issues. Regular cleaning of the discs is also recommended.
The Feed Dogs
Vintage Singer sewing machine manuals emphasize the feed dogs’ function: moving the fabric evenly beneath the needle. These toothed metal bars are located below the presser foot and are vital for consistent stitch length.
Manuals illustrate how to raise and lower the feed dogs, a necessary adjustment for techniques like free-motion embroidery or darning. Proper cleaning, removing lint buildup, is also highlighted.
Troubleshooting sections address issues like uneven feeding, often caused by debris or incorrect presser foot pressure. Manuals detail how to maintain optimal feed dog performance.

Finding Instruction Manuals
Singer sewing machine manuals are readily available online through official archives and third-party websites, offering valuable guidance for operation and repair.
PDF formats are common, providing detailed instructions for various models, ensuring continued usability of these vintage machines.
Online Resources for Manuals
Numerous websites specialize in hosting vintage sewing machine manuals, offering a convenient way to access instructions for your Singer model. Websites like manualslib.com and others archive a vast collection of PDF documents.
These resources often allow searching by model number, simplifying the process of locating the correct manual. Many forums dedicated to vintage sewing also compile links to available manuals, creating community-driven databases.
Remember to verify the manual’s compatibility with your specific machine’s serial number for accurate guidance. Digital copies preserve these valuable resources for future generations of sewing enthusiasts.
Singer’s Official Archive
While a directly searchable, comprehensive online archive from Singer is currently limited, historical manuals are sometimes available through dedicated collector communities and third-party sites referencing Singer’s past publications.
Exploring these resources can uncover original PDF versions of instruction booklets, service guides, and parts lists for various vintage Singer models. These often provide detailed diagrams and troubleshooting advice.
Checking Singer’s official website for legacy support or contacting their customer service might yield information about accessing older documentation, though availability varies.
Third-Party Manual Websites
Numerous websites specialize in hosting vintage sewing machine manuals, including those for Singer. Sites like ISMACS (International Sewing Machine Collectors’ Association) offer extensive libraries, often with downloadable PDF versions.
Other platforms compile user-submitted manuals, creating a collaborative resource for owners of older machines. Searching specifically for “Singer model [number] manual” often yields relevant results.
Be cautious regarding download sources and verify file integrity before opening, ensuring a safe browsing experience while accessing these valuable resources.
Bobbin Winding and Threading
Singer machines utilize specific bobbin types; correct winding is crucial for even stitching. Manuals detail threading paths for both upper and lower threads,
ensuring proper tension and operation.
Types of Singer Bobbins
Singer sewing machines historically employed several bobbin styles, varying by model. Class 15 bobbins, a common type, are still readily available and suit many vintage machines.
Older models, like the 99K, often require specific aluminum or plastic bobbins detailed in their respective manuals.
Identifying the correct bobbin is vital; using the wrong type can cause tension issues, skipped stitches, and machine malfunction.
Consulting your machine’s manual or online resources dedicated to Singer bobbins ensures compatibility and optimal performance.
Husqvarna Viking Tribute 150C uses Husqvarna Bobbins.
Winding the Bobbin Correctly
Proper bobbin winding is crucial for consistent stitch quality. Your Singer machine’s manual will illustrate the specific winding process, typically involving placing the thread spool on the holder and guiding it through tension discs.
Engage the bobbin winder by moving the lever, and start the machine at a slow, steady pace. Ensure even distribution of thread on the bobbin to avoid uneven tension.
Refer to your manual for the correct number of wraps; overfilling or underfilling can cause problems. Disengage the winder when full.
Threading the Upper Thread
Consult your Singer sewing machine’s manual for the precise threading path, as it varies by model. Generally, begin by raising the presser foot and the needle to its highest position.
Guide the thread from the spool, through the tension discs, and around the take-up lever. Ensure the thread is securely seated in each guide to maintain proper tension.
Finally, thread the needle from front to back. Incorrect threading is a common cause of sewing issues, so follow the manual carefully.
Threading the Lower Thread
Refer to your Singer sewing machine’s manual for specific instructions, as bobbin threading differs between models. Many vintage Singer machines utilize a top-loading bobbin system, simplifying the process.
Insert the wound bobbin into the bobbin case, ensuring it rotates freely and the thread unwinds in the correct direction. Guide the thread through the tension spring and any designated slots.
Proper lower threading is crucial for balanced stitches; consult the manual diagrams for accurate guidance and avoid skipped stitches.
Basic Sewing Operations
Singer manuals detail essential techniques like straight and zigzag stitching. Adjust stitch length and width using designated dials for varied results.
Practice on scrap fabric to master tension and achieve consistent, professional-looking seams with your vintage machine.
Straight Stitching
Singer sewing machine manuals consistently emphasize straight stitching as the foundational skill for all sewing projects. Begin by threading the machine correctly, as detailed in your specific model’s instructions.
Select the straight stitch setting on your machine, typically indicated by a straight line symbol. Adjust the stitch length according to your fabric weight and desired seam strength – shorter stitches for delicate fabrics, longer for heavier materials.
Guide the fabric smoothly under the presser foot, maintaining a consistent seam allowance. Practice maintaining a straight line, using the edge of the presser foot as a guide. Consistent pressure and a steady pace are key to achieving neat, even stitches.
Zigzag Stitching
Singer manuals illustrate zigzag stitching as versatile for finishing raw edges, creating decorative designs, and sewing stretch fabrics. Select the zigzag stitch setting, usually represented by a zigzag symbol, and adjust the stitch width and length.
Wider stitches are ideal for decorative applications, while narrower stitches are better for reinforcing edges. Experiment with different settings on scrap fabric to understand their effects.
Guide the fabric slowly and steadily, ensuring the zigzag stitch evenly traverses the fabric edge. Zigzag stitching prevents fabric fraying and adds a professional finish to your sewing projects.
Adjusting Stitch Length and Width
Singer machine manuals detail dials or levers for adjusting stitch length and width. Stitch length controls the distance between stitches; shorter for delicate fabrics, longer for heavier materials.
Stitch width, applicable to zigzag and decorative stitches, determines the breadth of the stitch. Consult your manual for specific markings and their corresponding stitch dimensions.
Always test settings on scrap fabric before sewing your project. Gradual adjustments are recommended to achieve the desired stitch appearance and ensure fabric compatibility.

Troubleshooting Common Issues
Singer manuals offer solutions for thread breakage, skipped stitches, and needle issues.
Regular cleaning and oiling, as detailed in the manual, prevent many common problems.
Machine jamming often requires careful lint removal and proper threading, guided by the instructions.
Thread Breakage
Old Singer instruction manuals frequently address thread breakage as a common issue. PDF manuals emphasize checking the threading path for obstructions and ensuring correct tension settings.
Incorrect threading, a bent needle, or using the wrong type of thread are often cited as causes. The manual will detail how to re-thread the machine correctly, and advise on needle selection.
Furthermore, lint buildup in the tension discs can impede smooth thread flow, leading to breaks. Regularly cleaning these discs, as outlined in the manual, is crucial for prevention.
Skipped Stitches
Singer sewing machine manuals often diagnose skipped stitches as stemming from a dull or incorrectly inserted needle. PDF guides detail proper needle installation, ensuring the eye faces the correct direction.
The manual will also highlight the importance of using the appropriate needle size for the fabric weight. Incorrect sizing can cause the needle to struggle, resulting in skipped stitches.
Furthermore, timing issues or a build-up of lint around the feed dogs can contribute to this problem. Regular cleaning and, if necessary, professional servicing are recommended.
Needle Breakage
Singer sewing machine manuals frequently address needle breakage, often linking it to forcing the fabric through the machine. The manual emphasizes a gentle, consistent feed, avoiding strain on the needle.
Incorrect needle size for the fabric is another common cause, with heavier fabrics requiring stronger needles. PDF guides illustrate selecting the correct needle type and size for various materials.
Bent or damaged needles must be replaced immediately. The manual stresses inspecting the needle before each use and replacing it at the first sign of damage to prevent further issues.
Machine Jamming
Singer sewing machine manuals often detail troubleshooting for machine jamming, frequently attributing it to improper threading or tangled bobbin thread. PDF guides illustrate correct threading paths meticulously.
Lint and debris accumulation within the machine is another common culprit, requiring regular cleaning as outlined in the manual. Neglecting this can cause friction and jams.
Forcing fabric can also lead to jamming; the manual advises gentle feeding. If jamming occurs, stop immediately, re-thread, clean, and ensure the bobbin is correctly inserted.
Maintenance and Cleaning
Singer machine manuals emphasize regular oiling and lint removal for optimal performance. PDF guides detail specific lubrication points and cleaning procedures.
Consistent maintenance, as described in the manual, preserves the machine’s longevity and ensures smooth, reliable operation for years to come.
Oiling Your Singer Machine
Singer sewing machine manuals consistently stress the importance of regular oiling. Use a high-quality sewing machine oil, applying it sparingly to all moving parts detailed in your specific model’s PDF guide.
Key areas include the bobbin winder, shuttle hook, and any points where metal parts interact. Avoid over-oiling, as excess oil attracts lint and debris. Consult the manual for precise locations and recommended oiling frequency.
Proper lubrication minimizes friction, prevents wear, and ensures smooth, quiet operation, extending the life of your vintage Singer machine.
Cleaning Lint and Debris
Singer sewing machine manuals emphasize regular cleaning to maintain optimal performance. Lint and debris accumulate, hindering smooth operation. Use a soft brush, or compressed air, to remove lint from the bobbin area, feed dogs, and surrounding mechanisms.
Carefully clean around the needle clamp and shuttle hook, referencing your model’s PDF manual for specific instructions. Avoid using liquids directly on the machine; a slightly dampened cloth can be used cautiously.
Consistent cleaning prevents jamming and ensures accurate stitching, preserving the longevity of your vintage Singer.
Belt Replacement
Singer sewing machine manuals detail belt replacement procedures, crucial for restoring power transmission. Accessing the belt usually involves removing covers, as illustrated in your model’s PDF guide.
Carefully note the belt’s routing before removal to ensure correct reinstallation. Select a replacement belt of the appropriate size and material, often specified in the manual.
Proper tensioning is vital; too loose, and the machine won’t operate efficiently; too tight, and it can cause wear. Refer to diagrams within the manual for guidance.
Restoration and Repair
Singer machine manuals are invaluable for repair, aiding in parts identification and assembly. Finding replacements, or professional services, restores functionality.
PDF guides and online resources support DIY repairs, while specialized services handle complex restorations of these vintage machines.
Finding Replacement Parts
Locating original Singer parts for restoration can be challenging, but several avenues exist. Online marketplaces specializing in vintage sewing machine components are excellent starting points.
Detailed manuals, often available as PDF downloads, are crucial for identifying the correct part numbers. Dedicated forums and clubs connect owners who may have spares to trade or sell.
Some suppliers specialize in reproducing hard-to-find Singer parts, offering viable alternatives. Carefully compare parts with diagrams in your machine’s manual to ensure compatibility before purchasing.
Professional Restoration Services
For extensive repairs or a complete overhaul, consider professional restoration services. Skilled technicians specializing in vintage Singer machines can address complex issues.
A thorough restoration often involves disassembly, cleaning, lubrication, and replacement of worn parts, referencing original manuals for accuracy. PDF versions of these manuals aid technicians.
While more costly than DIY repairs, professional services ensure the machine is returned to optimal working condition, preserving its historical value and functionality. Expect detailed assessments and quotes.
DIY Repair Tips
Before attempting repairs, consult a Singer sewing machine manual – many are available online as PDFs. Simple issues like thread breakage or skipped stitches often have straightforward solutions.
Regular cleaning and oiling, guided by the manual, prevent many problems. Carefully inspect the needle, bobbin area, and tension discs for lint or damage.
Remember to disconnect the power (or handwheel) before any maintenance. Online forums and communities offer valuable advice and troubleshooting assistance for common repairs.
Advanced Techniques
Vintage Singer machines excel at darning and embroidery, techniques detailed in original instruction manuals.
Explore specialized attachments – information found within these manuals – to unlock a wider range of creative sewing possibilities.
Darning with a Singer Machine
Old Singer instruction manuals provide detailed guidance on darning, a technique for repairing holes in fabric.
Typically, a darning foot is utilized, allowing for controlled fabric movement under the needle.
The process involves layering threads across the damaged area, creating a woven patch. Manuals illustrate specific stitch settings and thread tensions for optimal results.
Different patterns, like satin stitch or zigzag, can be employed depending on the fabric and damage.
Mastering darning with a Singer machine extends garment life and showcases the machine’s versatility, as documented in these historical guides.
Embroidery Capabilities
While not all vintage Singer machines were dedicated embroidery machines, many possessed capabilities for decorative stitching. Old Singer instruction manuals detail how to utilize these features for basic embroidery work.
Attachments, like embroidery hoops and specialized feet, expanded the machine’s potential. Freehand embroidery and simple pattern tracing were common techniques.
Manuals often included sample designs and guidance on stitch selection for different effects.
These machines allowed for personalized embellishments, demonstrating a surprising level of creative flexibility beyond basic sewing.
Using Attachments and Accessories
Vintage Singer sewing machines boasted a wide array of attachments and accessories, significantly expanding their functionality. Old Singer instruction manuals are crucial for understanding their proper use.
These included specialized presser feet for various fabrics and techniques, hemmer feet, rufflers, and even decorative attachments for creating unique stitches. Manuals provided detailed diagrams and instructions for installation and operation.
Mastering these accessories unlocked a broader range of sewing possibilities, allowing users to tackle complex projects with greater ease and precision.
Resources and Communities
Online forums and clubs connect Singer enthusiasts, offering support and access to manuals. Books and publications further enhance knowledge of these machines.
These communities provide invaluable assistance with restoration, repair, and locating old Singer sewing machine instruction manuals.
Online Singer Sewing Machine Forums
Numerous online forums are dedicated to vintage Singer sewing machines, serving as vibrant hubs for enthusiasts. These platforms frequently host dedicated threads specifically for locating old Singer sewing machine instruction manuals, often shared as downloadable PDF files.
Members readily assist with identifying models, decoding serial numbers, and troubleshooting issues. Experienced users often possess extensive manual collections and willingly share their knowledge. These forums are invaluable resources for finding information not readily available elsewhere, fostering a collaborative spirit among Singer aficionados.
Vintage Sewing Machine Clubs
Local and national vintage sewing machine clubs offer a tangible community for Singer enthusiasts. Members frequently exchange old sewing machine instruction manuals, parts, and expertise. Club meetings often include workshops on machine maintenance, repair, and restoration techniques.
These groups provide a unique opportunity to learn from experienced collectors and gain hands-on assistance with your Singer machine. Networking within these clubs can unlock access to rare manuals and specialized knowledge unavailable online, fostering a passion for preserving sewing history.
Books and Publications
Numerous books delve into the history and mechanics of vintage Singer sewing machines, often including reproduced sections of old instruction manuals. These publications provide detailed diagrams and explanations of machine parts and operations. Specialized texts focus on restoration, offering guidance on sourcing replacement components and performing repairs.
Beyond dedicated Singer books, broader vintage sewing guides frequently feature information relevant to these machines. Exploring these resources can supplement online manuals and offer a deeper understanding of the era’s sewing techniques.